
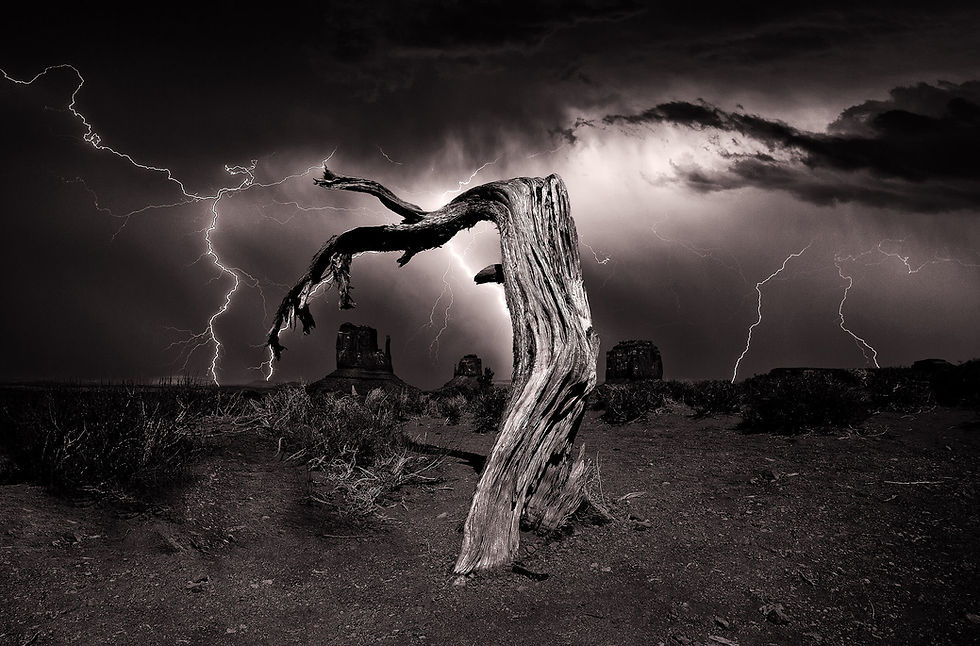
I took over 80 PHOTOGRAPHS in a raging thunderstorm to get this shot... here’s how it was done!
- Jared G Marshall
- May 1, 2019
- 3 min read
Updated: May 11, 2020
Capturing lightning on camera is a challenge, but an absolutely worthwhile one. It’s impossible to predict the amounts of rain, wind and lightning you may see. Many times, I’ve been in the pouring rain and freezing wind, firing shot after shot in the direction I think the lightning will strike. But it’ll strike to the left, right, behind... every direction but where I’m set up. It can be frustrating!
Having said this, I have successfully managed to capture some fantastic lightning images. I’ll share how you can do the same and how I captured the photograph featured on this page.
EQUIPMENT YOU WILL NEED
Camera: Preferably a DSLR, or any camera with full manual control over exposure times.
Tripod: Avoid light weight tripods or weigh one down if it’s your only option.
Fast Memory Card
Rain Cover: For your camera (a heavy-duty garbage bag will also do the job)
Towels
Umbrella: Not a necessity but the experience will be much more tolerable if you’re shooting in heavy rain.
Torch: If shooting at night this will really help. It can also be used to “paint” your foreground in light which I explain later.
The weather forecast predicted storms. I headed to the location a couple of hours before sunset, found the composition I wanted with the tree and set up the camera and tripod. I had a remote trigger connected to the camera for a couple of reasons. Firstly, it stops you from shaking the camera each time you hit the shutter release, and secondly, I was able to take some shelter in my car. If you don’t have a remote trigger, you can set your camera timer for a couple of seconds so that you have a moment to take your hands off the camera body before the shutter releases.
EXPOSURE
Lightning is unpredictable so to maximise your chance of capturing it, use a longer exposure time. My setup was as ollows:
hutter Speed: 20 Second
perture: F 8.
SO: 20
Lens: 16-35mm at 35m
FORMAT: RAW
The trick is to set your exposure as if a giant flash will light your scene. If you shoot for the landscape and lightning hits it will be horribly blown out and overexposed.
There were often times in between shots where there would be absolutely incredible lightning strikes, just as an exposure finished but before I had time to fire off the next. To give yourself a higher chance of lightning striking within your frame, shoot exposures of 20 seconds rapidly one after another.
PAINTING THE FOREGROUND
To light the tree in the foreground, I used the headlights of my car. I didn’t want to end up with some amazing sky with the tree and the rocky buttes in the distance just silhouettes. During each exposure I would flash my headlights to illuminate the foreground. You can also use a torch to paint any foreground object with light.
POST PRODUCTION
Post processing this image was straight forward. The biggest issue I faced was the dramatic colour temperature difference between the lightning and the car headlights however, when I did the monochromatic test, I loved it. This saved me having to edit the foreground and match the light sources in photoshop. Given the desert location, I added some coffee tones to the shadows and applied some dodging, burning and sharpening.
I hope this is a bit of a help, and that next time there’s a storm you have some motivation to get out in it! Just be aware, shelter in a car or overpass if you’re able, and enjoy it all! If you have any questions don’t hesitate to email me info@jgmarshall.photos or use the form on the contact us page here.
Stay well.
JM
📷
Jared G Marshall is a Multi Award Winning Director Of Photography, SOC Film and TV Camera Operator, Photographer. Originally from Melbourne, Australia, his work now takes place globally.
Subscribe below and keep up to date by following on Instagram, Twitter and Facebook.


Comments